Basic Android custom dialog Example :
Example1:
File : res/layout/main.xml<?xml version="1.0" encoding="utf-8"?>
<LinearLayout xmlns:android="http://schemas.android.com/apk/res/android"
android:layout_width="fill_parent"
android:layout_height="fill_parent"
android:orientation="vertical" >
<Button
android:id="@+id/buttonShowCustomDialog"
android:layout_width="wrap_content"
android:layout_height="wrap_content"
android:text="Show Custom Dialog" />
</LinearLayout>
File : res/layout/custom.xml
<?xml version="1.0" encoding="utf-8"?>
<RelativeLayout xmlns:android="http://schemas.android.com/apk/res/android"
android:layout_width="fill_parent"
android:layout_height="fill_parent" >
<ImageView
android:id="@+id/image"
android:layout_width="wrap_content"
android:layout_height="wrap_content"
android:layout_marginRight="5dp" />
<TextView
android:id="@+id/text"
android:layout_width="fill_parent"
android:layout_height="wrap_content"
android:textColor="#FFF"
android:layout_toRightOf="@+id/image"/>/>
<Button
android:id="@+id/dialogButtonOK"
android:layout_width="100px"
android:layout_height="wrap_content"
android:text=" Ok "
android:layout_marginTop="5dp"
android:layout_marginRight="5dp"
android:layout_below="@+id/image"
/>
</RelativeLayout>
File : MainActivity.java
import android.app.Activity;
import android.app.Dialog;
import android.content.Context;
import android.os.Bundle;
import android.view.View;
import android.view.View.OnClickListener;
import android.widget.Button;
import android.widget.ImageView;
import android.widget.TextView;
public class MainActivity extends Activity {
final Context context = this;
private Button button;
public void onCreate(Bundle savedInstanceState) {
super.onCreate(savedInstanceState);
setContentView(R.layout.main);
button = (Button) findViewById(R.id.buttonShowCustomDialog);
// add button listener
button.setOnClickListener(new OnClickListener() {
@Override
public void onClick(View arg0) {
// custom dialog
final Dialog dialog = new Dialog(context);
dialog.setContentView(R.layout.custom);
dialog.setTitle("Title...");
// set the custom dialog components - text, image and button
TextView text = (TextView) dialog.findViewById(R.id.text);
text.setText("Android custom dialog example!");
ImageView image = (ImageView) dialog.findViewById(R.id.image);
image.setImageResource(R.drawable.ic_launcher);
Button dialogButton = (Button) dialog.findViewById(R.id.dialogButtonOK);
// if button is clicked, close the custom dialog
dialogButton.setOnClickListener(new OnClickListener() {
@Override
public void onClick(View v) {
dialog.dismiss();
}
});
dialog.show();
}
});
}
}
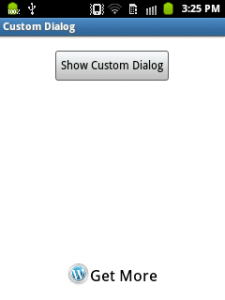
Download Code:link1Output:


Example 2:

A small window with any view pop up the front of activity is called Dialog.
First of create Object of Dialog.
Dialog dialog = new Dialog(MainActivity.this);Now constructor of Dilaog class have first Activity Object and Second style of dialog
dialog = new Dialog(MainActivity.this,android.R.style.Theme_Translucent);Using android.R.style you can set different Theme to Dialog.here we set Theme_Translucent.using this we can hide default background and border of Dialog.
When we use custom dialog its neccesary to remove default title of Dialog.so using Window feature we can remove title of dialog if we can't do it then only white space is shown at the top of dialog.
dialog.requestWindowFeature(Window.FEATURE_NO_TITLE);You can dismiss dialog without interact.or when Back button is pressed dialog is dismiss.Using setCancelable(boolean) we can dismiss dialog.when you set false then you cant dismiss dialog on Back Button pressed.
dialog.setCancelable(true);Now ,Important thing is how to set view or layout to dialog .and how to refrenced view using layout.using setContenView we can set view to dialog.
dialog.setContentView(R.layout.dialog);dialog.xml
<?xml version="1.0" encoding="utf-8"?>
<RelativeLayout xmlns:android="http://schemas.android.com/apk/res/android"
    android:layout_width="wrap_content"
    android:layout_height="wrap_content"
android:layout_gravity="center"
android:background="@drawable/bgdialog"
android:orientation="vertical" >
    <TextView
        android:id="@+id/tv"
        android:layout_width="wrap_content"
        android:layout_height="wrap_content"
        android:layout_alignParentTop="true"
        android:layout_centerHorizontal="true"
        android:text="My Custom Dialog"
        android:textAppearance="?android:attr/textAppearanceMedium" />
    <EditText
        android:id="@+id/etsearch"
        android:layout_width="250dp"
        android:layout_height="wrap_content"
        android:layout_below="@+id/tv"
        android:layout_centerHorizontal="true"
        android:layout_margin="10dp" >
        <requestFocus />
    </EditText>
    <Button
        android:id="@+id/btncancel"
        android:layout_width="wrap_content"
        android:layout_height="wrap_content"
        android:layout_alignRight="@+id/etsearch"
        android:layout_below="@+id/etsearch"
        android:layout_marginRight="24dp"
        android:text=" Cancel " />
    <Button
        android:id="@+id/btnsearch"
        android:layout_width="wrap_content"
        android:layout_height="wrap_content"
        android:layout_alignBaseline="@+id/btncancel"
        android:layout_alignBottom="@+id/btncancel"
        android:layout_alignLeft="@+id/etsearch"
        android:layout_marginLeft="27dp"
        android:text=" Search " />
</RelativeLayout>
using Dialog object you can give refrenced all view.Mind that if you dont add dialog then its give Exception.Null Pointer Exception.
EditText etSearch = (EditText) dialog.findViewById(R.id.etsearch);Button btnSearch = (Button) dialog.findViewById(R.id.btnsearch);
Button btnCancel = (Button) dialog.findViewById(R.id.btncancel);After Completing, Don't forgot to show Dialog.without calling .show() you cant show dialog if every thing is right.
dialog.show();and when you want to close or hide dialog use dismiss().
dialog.dismiss();DownLoad Full Code From Here DownLoad Source CodeExample 3:
<?xml version="1.0" encoding="utf-8"?>
<LinearLayout xmlns:android="http://schemas.android.com/apk/res/android"
android:layout_width="fill_parent"
android:layout_height="80dp"
android:background="#3E80B4"
android:orientation="vertical" >
<TextView
android:id="@+id/txt_dia"
android:layout_width="wrap_content"
android:layout_height="wrap_content"
android:layout_gravity="center"
android:layout_margin="10dp"
android:text="Do you realy want to exit ?"
android:textColor="@android:color/white"
android:textSize="15dp"
android:textStyle="bold" >
</TextView>
<LinearLayout
android:layout_width="wrap_content"
android:layout_height="wrap_content"
android:layout_gravity="center"
android:background="#3E80B4"
android:orientation="horizontal" >
<Button
android:id="@+id/btn_yes"
android:layout_width="100dp"
android:layout_height="30dp"
android:background="@android:color/white"
android:clickable="true"
android:text="Yes"
android:textColor="#5DBCD2"
android:textStyle="bold" />
<Button
android:id="@+id/btn_no"
android:layout_width="100dp"
android:layout_height="30dp"
android:layout_marginLeft="5dp"
android:background="@android:color/white"
android:clickable="true"
android:text="No"
android:textColor="#5DBCD2"
android:textStyle="bold" />
</LinearLayout>
</LinearLayout>public class CustomDialogClass extends Dialog implements
android.view.View.OnClickListener {
public Activity c;
public Dialog d;
public Button yes, no;
public CustomDialogClass(Activity a) {
super(a);
// TODO Auto-generated constructor stub
this.c = a;
}
@Override
protected void onCreate(Bundle savedInstanceState) {
super.onCreate(savedInstanceState);
requestWindowFeature(Window.FEATURE_NO_TITLE);
setContentView(R.layout.custom_dialog);
yes = (Button) findViewById(R.id.btn_yes);
no = (Button) findViewById(R.id.btn_no);
yes.setOnClickListener(this);
no.setOnClickListener(this);
}
@Override
public void onClick(View v) {
switch (v.getId()) {
case R.id.btn_yes:
c.finish();
break;
case R.id.btn_no:
dismiss();
break;
default:
break;
}
dismiss();
}
}Now How to call it, in Activity or any ware in the app area ?public void Show_Dialog(View v) {
CustomDialogClass cdd = new CustomDialogClass(MainActivity.this);
cdd.show();
}Call above method in button’s click event likeandroid:onClick="Show_Dialog"So how it looks ?Main Screen

Example 4:
In Android, a dialog is usually a small floating window that appears in front of the present activity. once a dialog appears, the present activity loses focus and user interaction becomes focused on the dialog.
A dialog is usually wont to get a response from the user. In Android, a dialog is implemented as a dialog fragment, that floats on top of an activity and is displayed Model. Dialog fragments are useful once you need to acquire the user’s response before continuing with the execution or any type of permission etc .

To make a dialog fragment, you will need to extend the DialogFragment base class. This example shows you ways to make 2 styles of dialogs: AN input dialog and a Status dialog.
Note : This example (Project) is developed in Eclipse Version Kepler,tested on Android 4.4.2 (KitKat Version) and SDK build-tools 22.6.3
1. Open “res/layout/input_name_dialogfragment.xml” file and put this xml code it into file:
File : res/layout/input_name_dialogfragment.xml
<?xml version="1.0" encoding="utf-8"?>
<LinearLayout xmlns:android="http://schemas.android.com/apk/res/android"
android:layout_width="match_parent"
android:layout_height="match_parent"
android:orientation="vertical" >
<TextView
android:text="Enter Your name"
android:layout_width="wrap_content"
android:layout_height="wrap_content"
android:padding="10dp"
android:textSize="20dp"/>
<EditText
android:id="@+id/txtName"
android:layout_width="match_parent"
android:layout_height="wrap_content"
android:inputType="text"
android:imeOptions="actionDone"
android:layout_marginTop="5dp"/>
<Button
android:id="@+id/btnDone"
android:layout_width="match_parent"
android:layout_height="wrap_content"
android:text="Submit"
android:layout_margin="10dp"
android:background="#FFFFBB33"
android:textColor="#fff"
android:textStyle="bold"/>
</LinearLayout>
2. Open “res/layout/yes_no_dialogfragment.xml” file and put this xml code it into file:
File : res/layout/yes_no_dialogfragment.xml
This Userinterface contains a label and two buttons of android dialog box.
<?xml version="1.0" encoding="utf-8"?>
<LinearLayout xmlns:android="http://schemas.android.com/apk/res/android"
android:layout_width="match_parent"
android:layout_height="match_parent"
android:orientation="vertical" >
<TextView
android:layout_width="wrap_content"
android:layout_height="wrap_content"
android:padding="10dp"
android:text="Are you sure? On Internet"
android:textSize="20dp"/>
<LinearLayout
android:layout_width="300dp"
android:layout_height="wrap_content"
android:layout_gravity="center"
android:orientation="horizontal"
android:layout_marginTop="20dp">
<Button
android:id="@+id/btnYes"
android:layout_width="145dp"
android:layout_height="wrap_content"
android:text="Yes"
android:background="#00CC66"
android:textColor="#fff"
android:textStyle="bold"
android:layout_margin="5dp"/>
<Button
android:id="@+id/btnNo"
android:layout_width="145dp"
android:layout_height="wrap_content"
android:text="No"
android:background="#FF3333"
android:textColor="#fff"
android:textStyle="bold"
android:layout_margin="5dp" />
</LinearLayout>
</LinearLayout>
3. Open “InputNameDialogFragment.java” file and add following JAVA code.
File : src/package-name/InputNameDialogFragment.java
package androidinterview.com.customdialog;
import android.os.Bundle;
import android.support.v4.app.DialogFragment;
import android.view.LayoutInflater;
import android.view.View;
import android.view.ViewGroup;
import android.view.WindowManager.LayoutParams;
import android.widget.Button;
import android.widget.EditText;
public class InputNameDialogFragment extends DialogFragment {
EditText txtname;
Button btnDone;
static String DialogboxTitle;
public interface InputNameDialogListener {
void onFinishInputDialog(String inputText);
}
//---empty constructor required
public InputNameDialogFragment() {
}
//---set the title of the dialog window
public void setDialogTitle(String title) {
DialogboxTitle = title;
}
public View onCreateView(LayoutInflater inflater,ViewGroup container,Bundle saveInstanceState){
View view = inflater.inflate(
R.layout.input_name_dialogfragment, container);
//---get the EditText and Button views
txtname = (EditText) view.findViewById(R.id.txtName);
btnDone = (Button) view.findViewById(R.id.btnDone);
//---event handler for the button
btnDone.setOnClickListener(new View.OnClickListener()
{
public void onClick(View view) {
//---gets the calling activity
InputNameDialogListener activity = (InputNameDialogListener) getActivity();
activity.onFinishInputDialog(txtname.getText().toString());
//---dismiss the alert
dismiss();
}
});
//---show the keyboard automatically
txtname.requestFocus();
getDialog().getWindow().setSoftInputMode(
LayoutParams.SOFT_INPUT_STATE_VISIBLE);
//---set the title for the dialog
getDialog().setTitle(DialogboxTitle);
return view;
}
}
This class extends the DialogFragment base class and loads the UI defined within the input_name_dialogfragment.xmlfile. in this class, you created an interface called InputNameDialogListener with an abstract method named onFinishInputDialog(). This method are implemented by the activity that calls this class. In essence, it’s dismissed once the user clicks the button to shut the dialog.The text entered into the text box is then sent back to the calling activity through this method.
4. Open “YesNoDialogFragment.java” file and add following JAVA code.
File : src/package-name/YesNoDialogFragment.java
package androidinterview.com.customdialog;
import android.os.Bundle;
import android.support.v4.app.DialogFragment;
import android.view.LayoutInflater;
import android.view.View;
import android.view.View.OnClickListener;
import android.view.ViewGroup;
import android.widget.Button;
public class YesNoDialogFragment extends DialogFragment {
Button btnYes,btnNo;
static String DialogBoxTitle;
public interface YesNoDialogListener {
void onFinishYesNoDialog(boolean state);
}
//---empty constructor required
public YesNoDialogFragment(){
}
//---set the title of the dialog window---
public void setDialogTitle(String title) {
DialogBoxTitle= title;
}
public View onCreateView(LayoutInflater inflater,ViewGroup container,Bundle savedInstanceState ) {
View view= inflater.inflate(R.layout.yes_no_dialogfragment, container);
//---get the Button views---
btnYes = (Button) view.findViewById(R.id.btnYes);
btnNo = (Button) view.findViewById(R.id.btnNo);
// Button listener
btnYes.setOnClickListener(btnListener);
btnNo.setOnClickListener(btnListener);
//---set the title for the dialog
getDialog().setTitle(DialogBoxTitle);
return view;
}
//---create an anonymous class to act as a button click listener
private OnClickListener btnListener = new OnClickListener()
{
public void onClick(View v)
{
//---gets the calling activity---
YesNoDialogListener activity = (YesNoDialogListener) getActivity();
boolean state =
((Button) v).getText().toString().equals("Yes") ? true : false;
activity.onFinishYesNoDialog(state);
//---dismiss the alert---
dismiss();
}
};
}
same as InputNameDialogFragment class, this class extends the DialogFragment class and implements an interface.
5. Open “res/layout/activity_main.xml” file and put this xml code it into file:
File : res/layout/activity_main.xml
<LinearLayout xmlns:android="http://schemas.android.com/apk/res/android"
xmlns:tools="http://schemas.android.com/tools"
android:layout_width="match_parent"
android:layout_height="match_parent"
android:orientation="vertical" >
<Button
android:layout_width="match_parent"
android:layout_height="wrap_content"
android:text="Show Input Dialog"
android:onClick="btnShowDialog" />
<Button
android:layout_width="match_parent"
android:layout_height="wrap_content"
android:text="Show Yes/No Dialog"
android:onClick="btnShowYesNoDialog" />
</LinearLayout>
6. Open “MainAcitvity.class” file and add following JAVA code.
File : src/package-name/MainActivity.java
package androidinterview.com.customdialog;
import android.os.Bundle;
import android.support.v4.app.FragmentActivity;
import android.support.v4.app.FragmentManager;
import android.view.View;
import android.widget.Toast;
import androidinterview.com.customdialog.InputNameDialogFragment.InputNameDialogListener;
import androidinterview.com.customdialog.YesNoDialogFragment.YesNoDialogListener;
public class MainActivity extends FragmentActivity implements YesNoDialogListener, InputNameDialogListener {
@Override
protected void onCreate(Bundle savedInstanceState) {
super.onCreate(savedInstanceState);
setContentView(R.layout.activity_main);
}
//-- InputName Dialog box
public void btnShowDialog(View view) {
showInputNameDialog();
}
private void showInputNameDialog() {
FragmentManager fragmentManager = getSupportFragmentManager();
InputNameDialogFragment inputNameDialog = new InputNameDialogFragment();
inputNameDialog.setCancelable(false);
inputNameDialog.setDialogTitle("Enter Name");
inputNameDialog.show(fragmentManager, "Input Dialog");
}
@Override
public void onFinishInputDialog(String inputText) {
// -- Finish dialog box show msg
Toast.makeText(this, "Input Name to dialog: " + inputText,
Toast.LENGTH_SHORT).show();
}
//-- YES-No Dialog box
public void btnShowYesNoDialog(View view) {
showYesNoDialog();
}
private void showYesNoDialog() {
FragmentManager fragmentManager = getSupportFragmentManager();
YesNoDialogFragment yesnoDialog = new YesNoDialogFragment();
yesnoDialog.setCancelable(false);
yesnoDialog.setDialogTitle("Select One");
yesnoDialog.show(fragmentManager, "Yes/No Dialog");
}
@Override
public void onFinishYesNoDialog(boolean state) {
// -- Finish dialog box show msg
Toast.makeText(this, "Which Option Selected: " + state,
Toast.LENGTH_SHORT).show();
}
}
Basic Android custom dialog Example
 Reviewed by Anonymous
on
January 06, 2016
Rating:
Reviewed by Anonymous
on
January 06, 2016
Rating:
Reviewed by Anonymous
on
January 06, 2016
Rating:


No comments: